
How to Choose a Single Flute End Mill Cutter?

Time:2026-10-11 Author:Sienna
0%

Choosing a Single Flute End Mill Cutter is not simply a matter of selecting the largest diameter or highest speed. The correct choice depends on material, machine rigidity, spindle performance, workholding, and chip evacuation. Aluminum may benefit from a polished flute and generous chip space, while plastics demand careful heat control. A cutter that performs well on acrylic can behave poorly in brass.

John Saunders, a respected machining educator, often emphasizes, “Small changes in cutting conditions can create large changes in results.” That principle matters when selecting a Single Flute End Mill Cutter. A small increase in feed rate, excessive tool stickout, or minor spindle runout can leave visible marks on a machined edge. Practical experience shows that a short, rigid setup usually matters more than impressive catalog specifications.

There is no perfect cutter.

This guide examines diameter, flute geometry, coating, shank size, and material compatibility. It also considers chip load, spindle speed, feed rate, and coolant strategy. Manufacturer data should remain the starting point, not the final answer. Real cutting conditions often differ from laboratory recommendations. A rigid CNC router may use different settings from a compact desktop machine. Even experienced operators occasionally choose a tool that looks suitable but produces heat, vibration, or poor surface quality. That mistake can be useful when the cutting evidence is recorded and reviewed carefully.
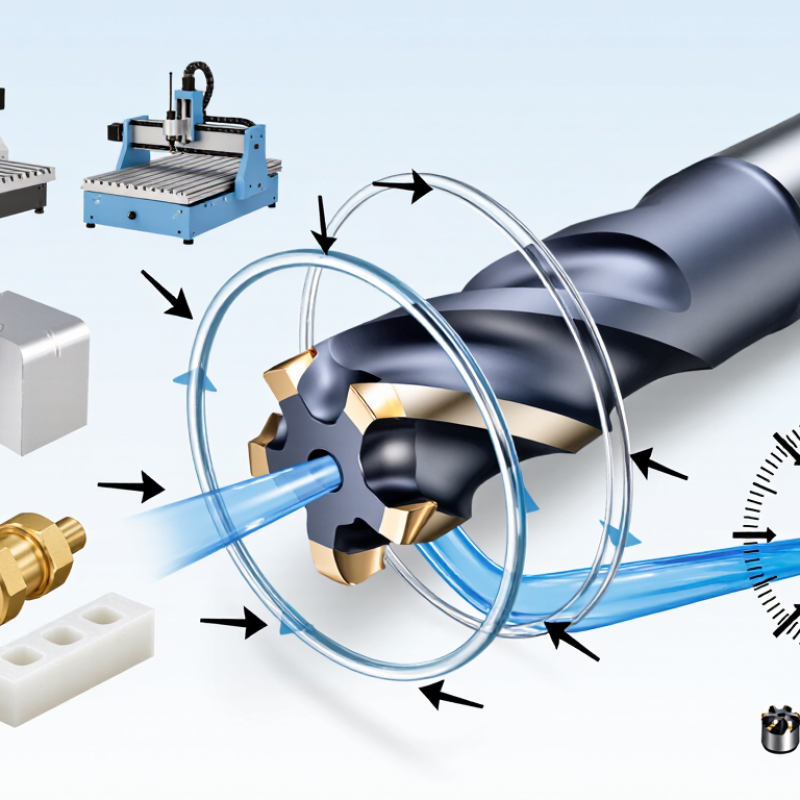
How to Choose a Single Flute End Mill Cutter?

Understanding the Design and Purpose of a Single Flute End Mill Cutter

How to Choose a Single Flute End Mill Cutter?

A single flute end mill has one cutting edge and one unusually wide flute. This open channel gives chips more room to escape. It also reduces cutting resistance during high-speed machining. The design suits aluminum, plastics, wood, and other soft materials.

The International Aluminium Institute reported global primary aluminum production of about 70.6 million tonnes in 2023. That scale explains why efficient aluminum machining remains important in modern workshops.

The cutter’s purpose is not simply speed. Its geometry must match the material, spindle, and machine rigidity. A large flute can improve chip evacuation, but it may weaken the tool core. A small diameter can reach narrow features, yet it deflects more easily.

In practice, I check the workpiece edge first. Burrs, melted plastic, or packed chips often reveal poor flute loading. ISO 8688-2 provides standardized methods for evaluating milling tool life, although real workshop results can differ. That limitation matters. Published figures cannot fully represent every machine setup.

Tips:

  • Start with the cutter maker’s recommended speed and feed range.
  • Reduce feed when the machine vibrates.
  • Increase chip load carefully when chips appear powdery.
  • Use air blast for aluminum and plastics when possible.
  • Avoid rubbing.
  • A polished flute can help, but it does not fix incorrect settings.
  • One detail is easy to miss: verify the tool’s actual diameter before programming. Even a small difference changes the radial engagement and cutting load.

Matching Flute Geometry to Material and Machining Requirements

How to Choose a Single Flute End Mill Cutter?

Matching Flute Geometry to Material and Machining Requirements

A single flute end mill leaves more space for chips than multi-flute tools. That space matters during high-speed cutting. For aluminum, choose a sharp edge, polished flute, and generous rake angle. These features reduce chip packing and help produce a cleaner wall. Watch the chips. Long, bright chips usually indicate effective evacuation, while welded material suggests rising heat or insufficient lubrication.

Plastics require similar sharpness, but geometry must control heat carefully. A polished flute and a moderate helix can prevent softened chips from sticking inside the cut. For wood or softer composite materials, an upcut geometry can clear debris quickly, though it may lift thin workpieces. Clamping becomes critical. A small change in workholding can damage an otherwise suitable cutter.

Machining requirements also influence the choice. Deep slotting needs maximum chip clearance, while shallow profiling may benefit from a stronger cutting edge and moderate rake. Check tool diameter, flute length, spindle runout, and machine rigidity together. Feed rate and spindle speed must match the material, not just the cutter diameter.

Heat changes everything. I have seen a theoretically correct geometry fail because the workpiece was poorly supported. A test cut on scrap material remains valuable, especially when the material contains fillers or behaves unpredictably. Perfect charts do not replace observation.

Selecting the Right Cutter Diameter, Length, and Cutting Parameters

How to Choose a Single Flute End Mill Cutter?

Selecting the right cutter diameter starts with the feature size and required rigidity. Use the largest diameter that can enter the pocket or follow the contour. Larger cutters usually deflect less and remove material more steadily. For narrow slots, a smaller cutter is necessary, but it needs gentler cutting conditions. I often check the toolpath before machining. A theoretical fit may still create a sharp, difficult corner.

Length matters as much as diameter. Choose the shortest cutting length that reaches the full wall depth. Excessive stickout can cause chatter, visible tool marks, and premature edge wear. For example, a 6 mm cutter extending 35 mm is less stable than one extending 15 mm. A practical starting point is keeping stickout near one to two tool diameters, then adjusting after a test cut. It is not a perfect rule.

Cutting parameters should match the material, machine, and cutter geometry. Calculate spindle speed from cutting speed and diameter, then set feed using chip load, flute count, and rpm. Since a single flute has one cutting edge, feed rates may differ from multi-flute tools. Begin conservatively, especially in deep pockets. Listen for a sharp ringing sound. That usually needs attention. I have sometimes reduced speed when increasing feed was the better correction. This is why a small test piece remains valuable. Check chips, edge temperature, and surface finish after each adjustment.

Checking Tool Compatibility with the Machine and Workholding Setup

A single flute end mill is not automatically suitable because its diameter fits the spindle. Compatibility starts with the machine’s speed range, collet size, runout, and available power. Check the cutter’s recommended diameter against the spindle’s minimum and maximum rpm. A small cutter may need high speed. Some older machines cannot reach it safely. Measure the actual collet and holder, not only the machine manual. Clean mating surfaces matter. Even a small chip can create visible runout.

Workholding deserves equal attention. The cutter must reach the material without striking clamps, jaws, screws, or the vise body. Simulate the toolpath with the real setup, including stock height and fixture offsets. Leave enough clearance for the holder, not just the cutting edges. Thin sheets need firm support because a single flute can pull flexible material upward. I have seen a secure-looking clamp allow vibration near an unsupported corner. It looked acceptable at idle. Cutting exposed the weakness.

Match the tool geometry to the machine’s control and material-handling limits. Confirm coolant or air delivery, chip evacuation, and whether the machine can maintain a steady feed. A single flute needs room for chips. Crowding the gullet can cause heat and surface damage. Test with a conservative pass, then inspect sound, chips, and edge condition. Do not trust one successful trial too much. Tool compatibility can change when stock thickness, fixture position, or stickout changes. Record those details for repeat work, and question them when the result feels unusually easy.

How to Choose a Single Flute End Mill Cutter? - Checking Tool Compatibility with the Machine and Workholding Setup

Compatibility Dimension What to Check Practical Guidance Suitable Selection Example
Machine Type Confirm whether the machine is a CNC router, machining center, or manual mill with an appropriate spindle. Single-flute cutters are commonly used for non-ferrous materials and plastics when high chip clearance is needed. The machine must provide controlled feed and speed adjustment. A CNC router with variable spindle speed is generally suitable for cutting aluminum sheet, acrylic, wood, and engineering plastics.
Spindle Speed Range Compare the machine’s minimum and maximum revolutions per minute with the cutter diameter and material. Smaller cutters require higher spindle speeds to reach an effective cutting speed. Do not exceed the cutter or tool-holder speed limit. For a 6 mm cutter, a spindle range that can operate around 12,000–18,000 rpm may be useful for many light-duty aluminum or plastic applications, subject to manufacturer data.
Feed-Rate Control Check whether feed rate can be set accurately in mm/min or inches/min and whether the machine can maintain it under load. A single flute has one cutting edge, so programmed feed should be calculated using chip load rather than copied from a multi-flute tool. Use the relationship: feed rate = spindle speed × number of flutes × chip load. For one flute, the number-of-flutes factor is 1.
Tool-Holder Interface Match the cutter shank diameter and holder type, such as ER collet, hydraulic holder, or straight-shank chuck. The shank must fit the holder correctly. Avoid reducing sleeves that create excessive runout or unsupported overhang. A cutter with a 6 mm shank should be held in a correctly sized, clean collet rather than forced into an incorrectly sized holder.
Runout Measure tool runout near the cutting edge with a suitable dial indicator or tool inspection device. High runout concentrates cutting on one edge, increasing wear, vibration, and dimensional error. Keep the tool, collet, and spindle taper clean. For precision finishing, aim for runout in the low-micron range when the holder and machine are capable of achieving it.
Tool Overhang Measure the distance from the holder nose to the tool tip and compare it with the cutter diameter. Shorter overhang improves rigidity. Long overhang increases deflection and chatter, especially during slotting or deep profiling. For a 6 mm cutter, use the shortest practical stick-out; a long-reach tool should be selected only when the workpiece geometry requires it.
Workholding Rigidity Check whether the vise, clamps, vacuum table, or fixture prevents movement and supports the cutting area. A single-flute cutter can remove chips efficiently, but it cannot compensate for a flexible workpiece or weak fixture. Use broad, evenly distributed clamping for thin sheet and add sacrificial support beneath parts cut on a vacuum or flat fixture.
Workpiece Thickness Compare the required cutting depth with the flute length and available clearance below the holder. The flute length should cover the cutting depth without rubbing the shank against the workpiece. Avoid unnecessary full-depth engagement. For a 10 mm thick plate, choose a flute length that safely clears the plate while allowing the holder to remain above the surface.
Material and Chip Evacuation Identify whether the material produces long, sticky chips or abrasive dust and verify that the machine can clear them. Single-flute geometry provides a large flute space, which is beneficial for aluminum, wood, and many plastics. Use suitable air blast, vacuum extraction, or coolant. Use air blast for aluminum chip removal and dust extraction for wood or plastic routing, while following the machine’s safety requirements.
Cutting Operation Determine whether the job involves slotting, profiling, pocketing, engraving, or shallow finishing. Full-width slotting creates more cutting load than side profiling. Reduce depth or width of cut when the machine or fixture is not rigid. A shallow profile cut is usually more forgiving than a full-depth slot in a thin, lightly clamped workpiece.
Coolant and Lubrication Check whether the machine supports flood coolant, mist, minimum-quantity lubrication, or dry cutting. Aluminum may benefit from air blast or suitable lubrication to reduce chip welding. Plastics often require controlled heat removal without melting the material. Use dry cutting with strong air evacuation only when heat and chip buildup remain controlled and the tool manufacturer permits it.
Safety Clearance Verify clearance between the cutter, holder, clamps, fixture, workpiece edges, and machine enclosure. Simulate the toolpath when possible. Include rapid movements, workholding height, tool length, and possible deflection under load. A tool with adequate cutting length but excessive holder diameter may still collide with a narrow pocket or nearby clamp.
Inspection and Test Cut Check surface finish, burr formation, chip shape, cutting sound, temperature, and dimensional accuracy. Begin with conservative cutting conditions, then adjust feed, speed, and depth of cut based on observed chip formation and machine stability. A clean, continuous chip and stable cutting sound generally indicate better conditions than rubbing, melting, heavy burrs, or intermittent chatter.

Avoiding Common Selection Errors and Maintaining Cutting Performance

Choosing a single flute end mill cutter starts with the workpiece, not the catalog photograph. For aluminum, soft plastics, and other gummy materials, the open flute creates space for chips. That space can reduce recutting, heat, and a rough, smeared wall. I check the cutter diameter against the slot width and required corner detail. A common error is choosing a small diameter for better access, then using excessive stickout. The tool may chatter before the cutting edge wears. Single flute is not automatically better. In harder materials, its feed balance and chip load may be unsuitable. Review the machine’s spindle range, rigidity, collet condition, and coolant or air delivery. These details matter more than a low purchase price.

Cutting performance depends on matching speed and feed to diameter, material, depth, and machine behavior. Do not copy a setting blindly. Start conservatively, then inspect the chip shape and machined surface. A clean, curled chip is useful evidence; dust, discoloration, or long stringers signal trouble. Keep the flute clear with directed air, especially in deep pockets. I have seen operators increase feed when the finish worsened, although the real problem was tool runout. That shortcut was wrong. Measure runout at the cutter, not only at the holder. After each job, remove chips, inspect the edge under magnification, and check for a polished wear band. A dull edge can still cut. It may also generate heat and force. Replace the cutter when performance drifts, even if the damage is not obvious. Record the material, settings, depth, and result; imperfect notes are better than repeated guesses.

FAQS

What is a single flute end mill designed to do?

It has one cutting edge and one wide flute. The open channel gives chips more room to escape. This design often suits aluminum, plastics, wood, and soft composites.

Why is chip evacuation important?

Poor chip removal can create heat, rubbing, and damaged surfaces. Watch the chips. Long, bright chips often show effective evacuation. Packed or welded chips suggest unsuitable settings.

Which flute features suit aluminum?

Choose a sharp edge, polished flute, and generous rake angle. These features can reduce chip packing and improve wall quality. Use air when possible. However, geometry alone cannot correct every machining error.

How should plastics be machined with this cutter?

Use a sharp cutter with a polished flute. A moderate helix can reduce softened chips sticking inside the cut. Control heat carefully. Melted edges usually deserve investigation.

What geometry works well for wood and soft composites?

An upcut design can remove debris quickly. It may also lift thin workpieces during cutting. Clamp flexible stock firmly. The setup matters more than expected.

How do machine limits affect cutter selection?

Check spindle speed, collet size, runout, available power, and cutter diameter. A small cutter may require speeds an older machine cannot safely reach. Measure the actual holder. Do not rely only on the manual.

What should be checked before programming the toolpath?

Verify the cutter’s real diameter before entering measurements. A small difference changes radial engagement and cutting load. Also check flute length, stickout, and holder clearance. Tiny errors matter.

How can workholding affect cutting performance?

Thin sheets need firm support because the cutter can pull them upward. Check clearance around clamps, screws, jaws, and the vise body. A setup may look stable at idle. Cutting can reveal hidden vibration.

How should cutting settings be adjusted?

Begin within the recommended speed and feed range. Reduce feed when vibration appears. Increase chip load carefully when chips look powdery. Avoid rubbing. I would still question any result that seems unusually easy.

Why is a test cut useful?

Scrap material can reveal heat, vibration, chip loading, and edge damage. Inspect the sound, chips, workpiece edge, and cutter after a conservative pass. Charts help. They cannot represent every machine, fixture, or material condition.

Conclusion

Choosing the right Single Flute End Mill Cutter begins with understanding its design and purpose. Its single cutting edge provides generous chip space, making it especially useful for materials that produce large or sticky chips, such as plastics, wood, and certain nonferrous metals. The flute geometry should match the workpiece, while the cutter’s diameter, cutting length, and overall reach should suit the feature being machined. A larger diameter may improve rigidity, whereas a longer tool may be necessary for deep areas but can increase vibration.

Before cutting, confirm that the tool shank fits the machine holder and that the workholding setup can keep the material secure. Cutting speed, feed rate, and depth of cut should be selected according to the material, tool size, and machine capability. Avoid common mistakes such as using excessive stick-out, choosing an unsuitable flute profile, or applying overly aggressive settings. Regularly inspect the cutting edge, remove built-up material, and adjust parameters when performance declines to maintain accuracy and tool life.

Sienna

Sienna

Sienna is a skilled marketing professional with a deep expertise in our company’s core products and services. With a passion for innovation and detail, she plays a pivotal role in crafting insightful blog posts that not only highlight the unique features of our offerings but also provide valuable......